
This blog is a translation of my German blog in the German portability hub.
Thanks to Wikia's Tools and helpful pages, many users can already use portable infoboxes ("PIs" for short). With some experience, images, various types of data or subheadings are no problem at all. But this is only the first step of creating an infobox. In most cases, you need more than that, you need CSS.
CSS[]
CSS is an important part of developing portable infoboxes, the other part being the PI language. The PI language on the template page is used to create a layout for the infobox by positioning its elements in a certain order for example. CSS, on the other hand, is used for styling the infoboxes, which means manipulating the infobox' look by changing the background colors, font sizes and many other things.
Many unportable infoboxes use the "style" attribute for defining inline styles, which are generally seen as unportable. More portable MediaWiki style sheets are used for portable infoboxes instead. Not only the increased portability is an advantage of MediaWiki style sheets, there are various other benefits.
Because CSS is such an important part of infoboxes, Wikia offers predefined CSS though the Europa theme for the users that are not experienced CSS coders. But every wiki is unique, so the infoboxes may require smaller or even bigger changes made by hand to fulfill your expectations.
The Europa theme[]
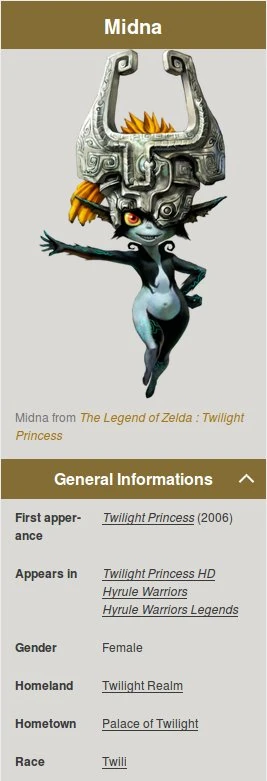
The typical Europa look
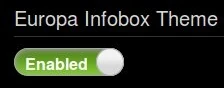
The Europa theme is a feature which adds predefined style sheets for your infoboxes in your wikia and can be activated or deactivated at any time through the WikiFeatures page. For the most part, these sheets are identical, but their only difference is that their colors adapt to the wikia's colors that were defined in the Theme designer.
Big, centered titles and headers are characteristic for the Europa theme. The wikias that are satisfied with that don't require any additional CSS. If you'd like to change a few minor things, you probably should leave the theme activated and restyle some parts of it. In case the theme doesn't fit your needs at all and you want to make major changes, deactivating the theme and making a new style sheet from scratch is most certainly best for you.
Adjusting your infoboxes[]
Infoboxes have unified classes in all wikis. This means that CSS can be copied from one wiki to another to achieve the same look, in case Europa is either activated in both wikis or deactivated in both wikis. This means that CSS selectors differ depending on the (de)activation of Europa.
CSS selectors without Europa[]
A CSS selector for portable infoboxes without Europa should always start with the class .portable-infobox.
Now you append another class for the element which you want to modify, for example .pi-title for modifying the title. The product in this case would be .portable-infobox .pi-title.
CSS selectors with Europa[]
CSS selectors for portable infoboxes with Europa generally start with .pi-europa.
If we again want to modify the title, .pi-title is appended again, which makes the product .pi-europa .pi-title this time.
Theme selectors[]
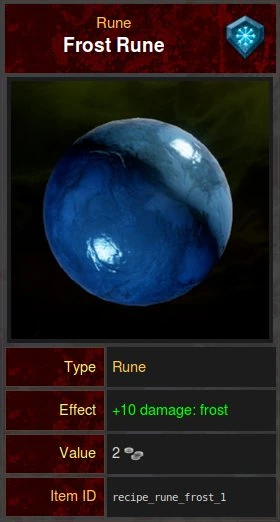
Theme selectors work independently of Europa
CSS selectors for your own themes begin with .pi-theme-themename, instead of .portable-infobox or .pi-europa. To affect your theme, you now replace "themename" with the actual name of the theme.
Selecting the title is no different from the other selectors, so you just append .pi-title again. This makes a possible product .pi-theme-themename .pi-title.
The advantage of these selectors is that they work totally independently from the (de)activation of Europa, which means that the CSS doesn't need to be rewritten into the (non-)Europa selectors.
Your own themes[]
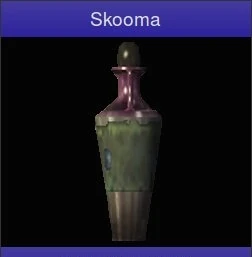
This infobox has a special design
It is possible to add an own theme to your portable infobox, which isn't a theme in the sense of Europa, but a theme in the sense of adding a class to your infobox so only this particular infobox is affected by the corresponding theme CSS selector. A theme is added through the PI language on the template page. The opening <infobox> tag receives a "theme" attribute, the result can look like this: <infobox theme="themename">. "themename" is replaced with an actual theme name, which shoud be logically connected to the topic, for example the theme "character" in a character infobox.
A PI with the theme "themename" is affected by less specific selectors like .portable-infobox or .pi-europa and also more specific selectors like .pi-theme-themename. The more specific CSS overrides the less specific CSS if they collide with each other. Selectors with other themes like .pi-theme-otherthemename don't affect this PI at all.
The advantage of themes is that you can style every infobox differently. Although this function is useful, you should always keep in mind that your infoboxes should be somewhat similar. Your infoboxes shouldn't differ too much, so it's best to only change minor things like colors and not major things like widths. It's a best practice to put the CSS that should affect all infoboxes into less specific selectors and the unique CSS into more specific selectors.
CSS classes[]
Of course, not only the title can be affected, there are also various other CSS classes for other elements. You can modify images, data, labels, values, headers and many others as well. The most important classes are listed here with an explanation and example.
No element[]
In case the selector consist of only .portable-infobox, .pi-theme-themename or .pi-europa, the infobox itself, meaning the container, is modified. Frequent modifications include changing the infobox' border (border:1px solid red;), its width (width:300px;) and the distance between the border and the content (padding:5px;).
.pi-background[]
.pi-background is used for changing the PI's background. The background is visible where it isn't overlayered by other elements with their own backgrounds. The background is defined by the background property (background:transparent;) and takes color names, color values (hex, RGB, HSL) or even images.
.pi-title[]
The title is modified by the class .pi-title. The background (background:black;), font size (font-size:18px; and line-height:22px;), font family (font-family:Comic Sans MS;), font weight (font-weight:bolder;), font color (color:green;) and padding (padding:6px;) are changed.

The image was shrunken, so it doesn't take too much vertical space.
.pi-image[]
Although the name misleads into the belief that .pi-image modifies the image itself, it actually modifies its container. Sometimes the background (background:blue;) or the border (border:2px dashed orange;) are adjusted.
.pi-image-thumbnail[]
.pi-image-thumbnail is the class for the actual image. If you changed your infobox' width, you probably should include these changes: width:auto;height:auto;max-width:100%. Additionaly, if you feel that some images stretch the infobox too high, you can add a maximal height for the images width max-height (max-height:600px;). This prevents the images from getting lartger than 600 pixels in height.
.pi-header[]
The class .pi-header affect subheadings. In most cases, their styling is nearly the same as the title's with minor adjustments like text align (text-align:left;) or font size (font-size:18px; and line-height:22px;). Basically, the title's styles can be copied and adjusted a little bit.
.pi-border-color[]
Even the borders between datas have their own class .pi-border-color. The border color (border-color:gray;) and the border thickness (border-width:2px;) are changed, but in case you don't want these borders, border-style:none; can be used.
.pi-data[]
.pi-data is the corresponding class for datas. Sometimes the distance to other datas (margin-bottom:2px;) and the padding (padding:1px 0;) are changed.
.pi-data-label[]
Like the name indicates, .pi-data-label affects labels in datas, basically the left column. Font size (font-size:14px; and line-height:16px;), font weight (font-weight:700;), font color (color:pink;), border (border-right:2px solid cyan), padding (padding:3px;) and width (flex-basis:125px;) are changed frequently.
.pi-data-value[]
The name makes it pretty obvious again, .pi-data-value changes data values, the right column of datas. The style are mostly identical with .pi-data-label's styles, sometimes the border (border-left:1px solid blue;) is changed.
Last words[]
That's already the end of this blog. Please post your feedback in the comments. I hope that reading this blog was interesting and that you learned something. Thanks for reading, have fun with portable infoboxes!