Adding images is a great way to improve any article. Photos and line drawings provide further detail and color — and they can even improve your wiki's search engine ranking.
This page will show you how easy it is to add them to any article!
Though we're primarily talking about static images on this page, the process is very similar to that of adding videos, though we encourage you to also read about our video embed tool, so that you can become an expert in adding visual media to your wiki.
This guide is primarily about adding images that are already uploaded to your wiki. We have a separate help page about uploading files, but you may find that you learn something about uploading here, too.
In our visual editors
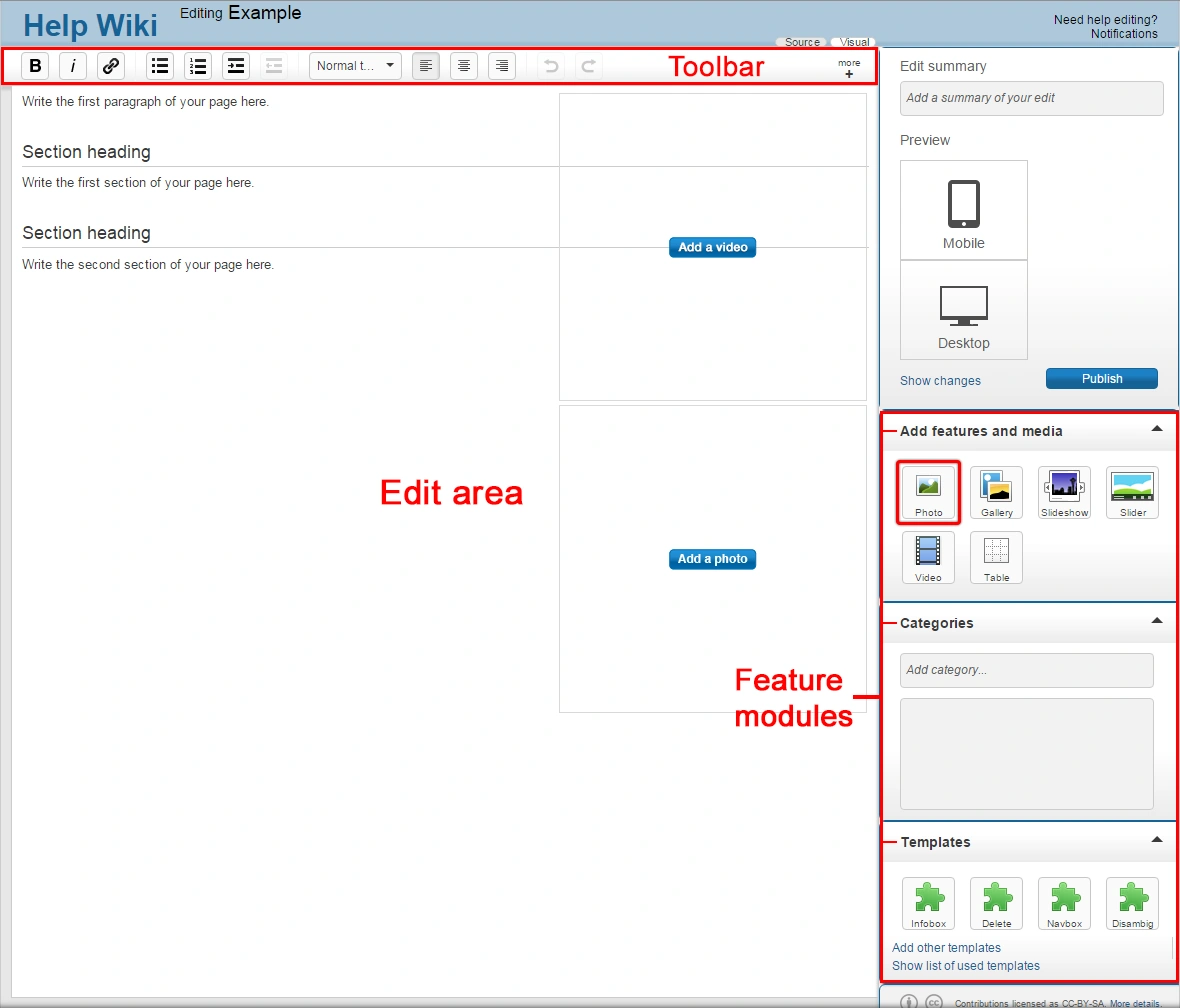
This is where you go in the classic editor to add an image
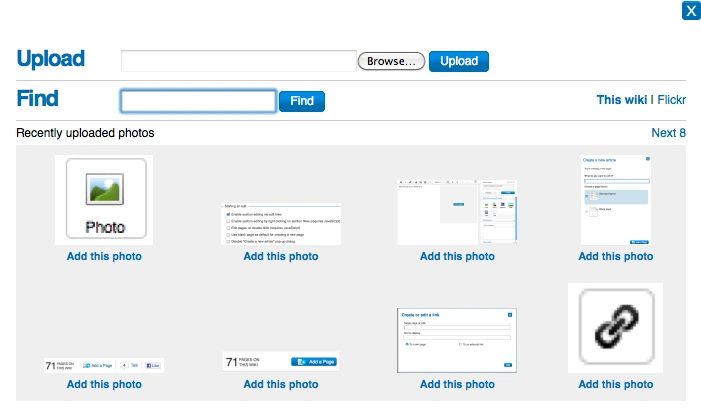
Finding an already-uploaded image in the classic editor
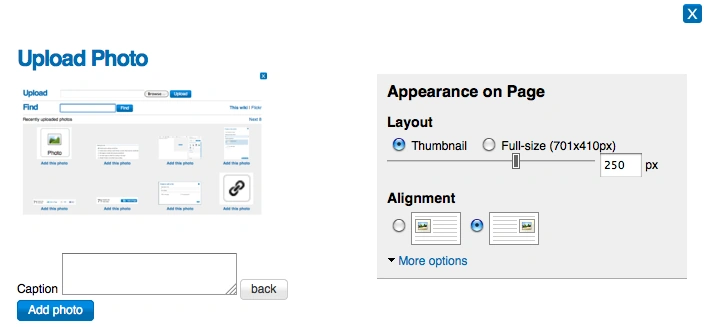
Here's where you add a caption and change the alignment or size of the image. Don't be confused by the fact that the screen says "upload photo" even though you're using an already-uploaded image.
Whether you're editing with our VisualEditor or our classic rich-text editor, the process of adding an image to a page is largely the same.
The following written section focuses on the classic editor, while the video at the top of the page shows you how to do it in the VisualEditor.
- To start, log in to your account, and then click the Edit button on the page where you'd like to add an image.
- Once in edit mode, click on the button labelled Photo
 on the right rail of the editor toolbar.
 - A pop-up will appear, which will allow you to search for photos already added to the community. (You can also upload an image from your computer here — but see this help page for more detailed info about uploading.)
- Once you choose an image to add, click upload.
- Next you will be able to adjust the size and placement of the photo. You can also provide a caption, which will display below the photo.
- After you have picked your options, click the Add photo button, and your photo will be added to the edit area.
- Images can be modified at any time in edit mode. Simply hover over the image and choose modify, and the same pop-up window will appear.
- Once you have completely finished editing the page, click publish and your photo will be live on the page.
Using source mode
Source editing differs significantly from the approach offered by Fandom's visual editors. However, it also allows you the ability to control additional aspects of your images via wikitext. There are so many interesting details about image display in source that we've created a whole page about it!
Uploading comes first
You can't use a file that doesn't exist on your wiki. If you try, you'll merely create a link — usually a red one — to an un-created file page.
Directly viewing images


Because they're typically thumbnails, images on a page are typically smaller. But you can grab a better look by going to the file page or by taking a peek in the lightbox. When reading a page, you can click on the image to bring up the lightbox. To then see the file page itself — and therefore have access to the image at all available resolutions — click on the name of the image at the top of the lightbox.
If you want to bypass the lightbox entirely, simply hold "Ctrl" (for Windows users) or "Command" (for Mac users), then click on the photo. It will open a new tab, but you'll be on the file page in the new tab.
See also
- Using wikitext with your images
- More details about uploading files
Further help and feedback
- Browse and search other help pages at Help:Contents
- Check Fandom Community Central for sources of further help and support
- Check Contacting Fandom for how to report any errors or unclear steps in this article