m (r2.7.2) (Robot: Adding es:Ayuda:Importando imágenes libres) |
m (r2.7.2) (Robot: Modifying de:Hilfe:Bilder, es:Ayuda:Mostrando imágenes) |
||
| Line 39: | Line 39: | ||
[[Category:Image help|{{PAGENAME}}]] |
[[Category:Image help|{{PAGENAME}}]] |
||
| − | [[de:Hilfe:Bilder |
+ | [[de:Hilfe:Bilder]] |
| − | [[es:Ayuda: |
+ | [[es:Ayuda:Mostrando imágenes]] |
[[fr:Aide:Images]] |
[[fr:Aide:Images]] |
||
[[ja:Help:画像の追加]] |
[[ja:Help:画像の追加]] |
||
Revision as of 12:26, 5 July 2012
Adding photos is a simple and great way to improve any article.
Step-by-Step
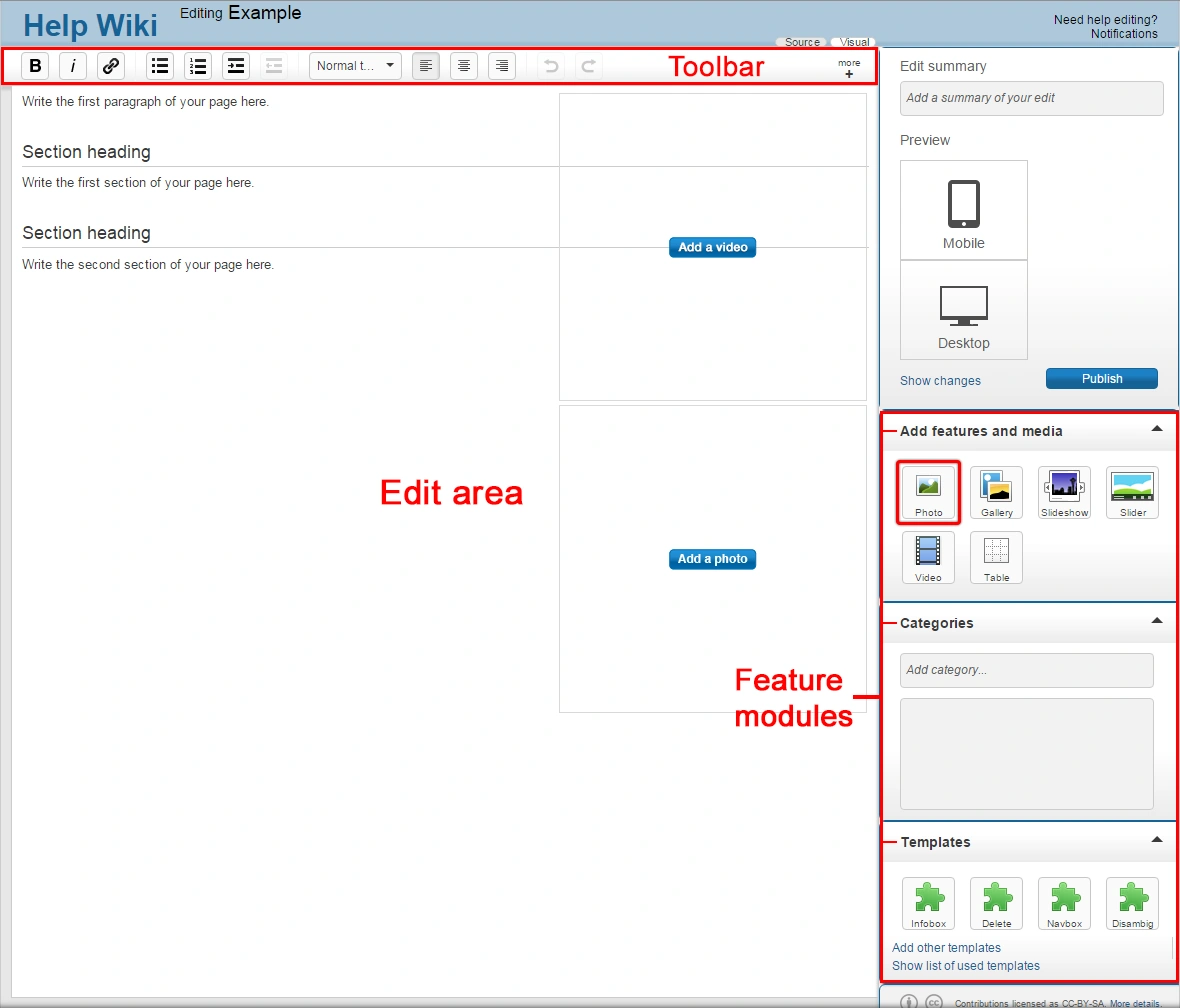
- To start, click the Edit button to enter the Wikia editor.
- Once in the editor, click on the photo upload button
 on the right rail of the editor toolbar.
- A pop-up will appear, which will allow you to Upload a photo from your computer.
- You can also search for find photos already added to the wiki by others or on Flickr.com.
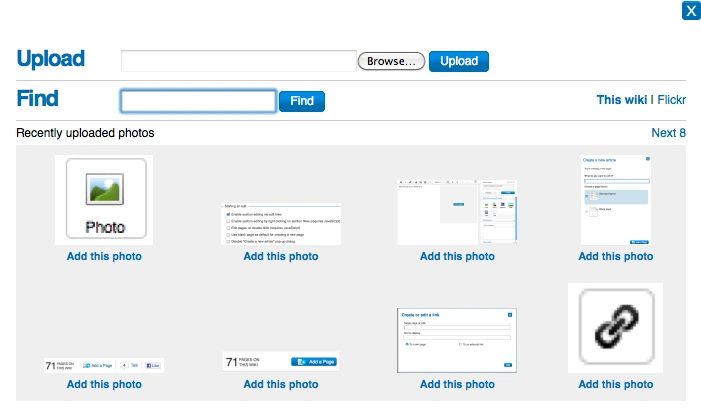
- Once you choose a photo to add, click upload.
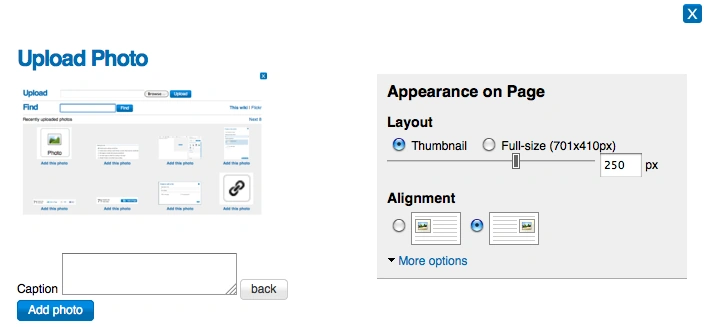
- Next you will be able to adjust the size and placement of the photo. You can also provide a caption, which will display below the photo.
- If you would like to provide adjust more details about the photo, including a new name and the license information, click on the more options link.
- After you have picked your options, click the Add photo button, and your photo will be added to the edit area.
- Photos can be modified at any time in edit mode. Simply hover over the image and choose "modify", and the same pop-up window will appear.
- Once you are done, click publish and your photo will be live on the page.
Next steps
- Learn how to format a page
- Learn how to add links
- Learn how to create a new page
More help
- More information is on Help:Uploading files
- Ask other users on the Wikia Forum
- Visit advanced help